Getting started with Logitech® Speaker Stand

Extrait du fichier (au format texte) :

Français Déballage et installation

Operazioni preliminari
Posizionamento dell'iPad 1. Sistemare l'iPad sul supporto collegandolo con cautela al connettore a 30 pin del supporto. Non esercitare una pressione eccessiva durante il collegamento. 2. Utilizzare il braccio del supporto per ruotare l'iPad in posizione verticale o orizzontale. 3. Utilizzare il braccio del supporto per regolare l'angolazione dell'iPad. Ascolto tramite l'iPad 1. Una volta collegato l'iPad al connettore a 30 pin del supporto, tenere premuto il pulsante di accensione/spegnimento per 2 secondi per accendere l'altoparlante. Si accenderà un indicatore luminoso blu. 2. Premere + e ­ sul pannello superiore per regolare il volume di sistema. 3. Spegnere l'altoparlante tenendo premuto il pulsante di accensione/spegnimento per 2 secondi. L'indicatore luminoso blu si spegne. 4. Come funzionalità aggiuntiva, l'iPad continua a ricaricarsi nel supporto fino a raggiungere il livello massimo di carica della batteria.
Nota: l'iPad continua a ricaricarsi anche se il pulsante di accensione/spegnimento è in posizione OFF; è sufficiente che l'unità sia collegata affinché l'iPad rimanga in carica.

Dansk Udpakning og installation
Tillykke med din nye iPad®-holder med højtalere. Du bedes bruge et par minutter på at læse følgende anvisninger og gøre dig bekendt med betjeningen så du kan få mest mulig glæde af holderen. Inden du tager enheden i brug, skal du kontrollere at følgende ting er i æsken: 1. iPad-højtalere 2. Adapter til lysnettet

Getting started with Logitech® Speaker Stand

Vous venez d'acheter un nouveau support avec haut-parleurs pour iPad® et nous vous en félicitons. Pour tirer le meilleur parti de votre support avec haut-parleurs, prenez quelques instants pour prendre connaissance des instructions suivantes et vous familiariser avec le fonctionnement de l'unité. Avant d'installer l'unité, assurez-vous que les éléments suivants sont présents dans le coffret: 1. Haut-parleurs pour iPad 2. Adaptateur secteur

Fonctionnalités
· · · · Dock rotatif (paysage ou portrait) Ecoute de musique ou visionnage d'un film avec l'iPad Rechargement de l'iPad Deux haut-parleurs à gamme complète
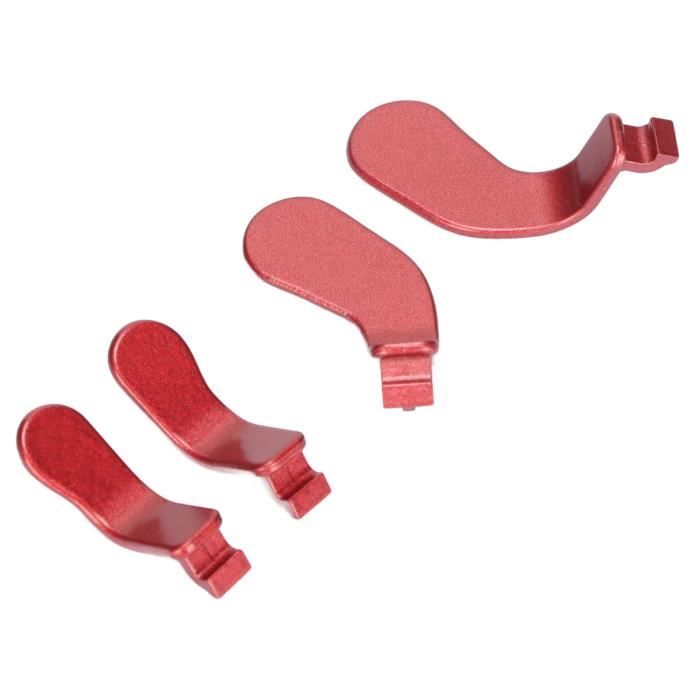
Clips pour iPad* * Pour l'iPad 2, attachez les bandes de fixation ici. Connecteur iPad VolMarche/Arrêt - Mode Vol+ Mode Paysage (pour le visionnage de vidéos) Mode Portrait Entrée AUX Entrée CC

Oversigt
· · · · Holder der kan roteres (liggende eller stående) Lyt til musik eller se en film på din iPad Oplad din iPad imens To højtalere med fuldtoneenheder iPad-klips* * Fastgør adapterbåndene til iPad 2 her. Stik til iPad Skru ned Tænd/sluk Skru op Liggende stilling (egnet til at se video) Stående stilling

Ascolto tramite un modello di iPod® non collegabile o altri dispositivi audio Se si utilizza un modello di iPod privo di porta per il collegamento, un diverso lettore MP3 o un altro dispositivo audio portatile, è possibile riprodurre l'audio in esso contenuto tramite il connettore di ingresso AUX collocato sul retro dell'unità. 1. Collegare un'estremità del cavo audio da 3,5 mm al connettore di uscita o per le cuffie sul dispositivo MP3 e l'altra estremità al connettore AUX nella parte posteriore dell'unità. 2. Accendere l'iPod non collegabile o il diverso dispositivo audio in uso, selezionare la musica, il film o il contenuto Web desiderato, quindi premere il pulsante di riproduzione. 3. Premere i pulsanti + e - per regolare il volume.
Nota: potrebbe essere necessario regolare anche il volume direttamente sull'iPod o sul diverso dispositivo audio in uso.

Ekstra indgangsstik (AUX) Strømstik

Première utilisation
Positionnement de l'iPad 1. Connectez l'iPad au support en l'installant délicatement dans le connecteur à 30 broches du support. Pour éviter tout dommage, n'essayez pas de forcer la connexion. 2. Utilisez les pattes du support pour caler l'iPad en mode portrait ou paysage. 3. Utilisez le bras du support pour ajuster l'angle de vision de l'iPad à votre goût. Lecture audio avec l'iPad 1. Lorsque l'iPad est connecté au connecteur 30 broches du support, maintenez le bouton de marche/arrêt enfoncé pendant deux secondes pour mettre les haut-parleurs sous tension. Un témoin bleu s'allume. 2. Appuyez sur les symboles + et ­ situés sur la base du support pour régler le volume du système. 3. Mettez les haut-parleurs hors tension en maintenant le bouton de marche/arrêt enfoncé pendant deux secondes. Le témoin bleu s'éteint alors. 4. Pour une commodité optimale, l'iPad continuera de se charger dans le dock jusqu'à ce que la batterie soit pleine.
Remarque: l'iPad se chargera même si le bouton d'alimentation est sur la position d'arrêt. Il faut simplement que l'unité soit branchée au secteur pour permettre la charge de l'iPad.

Kom godt i gang
Placering af din iPad 1. Slut iPad'en til holderen ved forsigtigt at anbringe iPad'en på holderens stik med 30 ben. Undgå at trykke for hårdt. 2. Brug holderens beslag til at rotere iPad'en til stående eller liggende stilling. 3. Brug holderens arm til at justere iPad'ens hældningsvinkel. Når du vil høre musik fra din iPad 1. Når iPad'en er sluttet til holderens stik med 30 ben, skal du holde tænd/sluk-knappen nede i to sekunder for at tænde højtalerne. Den blå indikator tændes. 2. Brug knapperne + og ­ til at skrue op og ned for lyden. 3. Du slukker højtalerne ved at holde tænd/sluk-knappen nede i to sekunder. Den blå indikator slukkes. 4. Hvis du lader din iPad sidde i holderen, fortsætter opladningen indtil batteriet er ladet helt op.
Bemærk: iPad'en oplades selv om enheden er slukket ­ den skal blot være sluttet til lysnettet for at oplade iPad'en.

4. Spegnere l'altoparlante tenendo premuto il pulsante di accensione/spegnimento per 2 secondi. L'indicatore luminoso blu al di sotto dei pulsanti deve essere spento.
Nota: è necessario spegnere anche l'iPod o il diverso dispositivo audio in uso.

English Unpacking and installation
Congratulations on the purchase of your new iPad® speaker stand. To get the most from your speaker stand, please take a few minutes to read the following instructions and familiarize yourself with the operation of the unit. Before setting up the unit, please check that the following items are included in the box: 1. iPad speaker 2. AC power adaptor

Nederlands Uitpakken en installatie
Gefeliciteerd met de aanschaf van uw nieuwe iPad®-speakervoetstuk. Voor optimaal gebruik van uw speakervoetstuk is het raadzaam deze aanwijzingen even door te lezen en u vertrouwd te maken met de werking van de eenheid. Controleer of de volgende onderdelen in de doos zijn meegeleverd, voordat u de eenheid instelt: 1. iPad-speaker 2. Wisselstroomadapter

Features
· · · · Rotation dock (landscape or portrait) Listen to music or watch a movie from your iPad Enjoy the freedom to charge your iPad Two full range speakers iPad clips* * For iPad 2, attach adaptor bands here. iPad connector VolPower/Mode Vol+ Landscape selection (for watching video) Portrait selection AUX in jack DC in jack

Functies
· · · · Draaibaar dock (liggend of staand) Luister naar muziek of kijk een film via uw iPad Geniet van de vrijheid om uw iPad op te laden Twee speakers met volledig bereik iPad-clips* * Bevestig hier de passtroken voor de iPad 2. iPad-connector Vol Aan-uitknop/modus Vol + Liggende positie (voor het kijken van video's) Staande positie AUX-ingang Gelijkstroomingang

Les promotions


Deskbooking Datasheet
26/03/2025 - www.logitech.com
epcn?h Wb? Essential T? Select m;R?]?OM ??u(Wb?m;R?]?OMg R?e?hH? {?tQqN?]?OMs?X?0Wb? Essential m;R?]?OMT? Select m;R?]?OMg R?e?hHSNc?O?Oncwv?R?QlhL????0v???v?W0V?0??~?{?t????Wb? Sync ??L? ? N?S?Qh?bv?N?T?O?O?0kd|{e?hHSNxnO?N:{?tTXT?TX]?c?O??zuE0??eHv?R? Qlzz??OS??0 ?{g~????R?QlhL Logi Tune ^?u(z ^?W(y?R?zNT?hL?bzNWGSNu(? SN^.R?`?v?V?? ?{g~????R?QlhL0e/cy>N?????R???? Ss? _STX]?gU?k"v?T N??????D??v?R?QlhLe??w?v?QsTX]?? N? c?SGV??v?SO?N SOO??R?0 W0V? Ou( Logi Tune N-v???0SN??[?NIv?W0V?c?SGR?Ql[?[??*0 ^.R?TX]?W(R?Ql[?Q?_??b~R0R?QlhL0T N?T?aQt??v?N?ri0 ??g R?N?xnO?W(R?Ql[?[?s???eHR?QlT?Oncw[??*0 {?tNm?? W(Wb?...

Accenture Cracking The Gender Code Report
13/03/2025 - www.logitech.com
CRACKING THE GENDER CODE GET 3X MORE WOMEN IN COMPUTING A research report produced jointly by 2 Cracking the Gender Code ACT NOW The gender gap in computing is getting worse and has severe implications for the U.S. economy. New research by Accenture and Girls Who Code shows that the share of women in computing jobs is in decline and suggests that universal access to computing in schools will not address the gender gap. Only by tailoring courses to girls' specific needs can we boost their commitment to...

Vc Whitepaper
Vc Whitepaper
28/03/2025 - www.logitech.com
ENABLE EVERY ROOM. ENABLE EVERY PERSON. Logitech Video Conferencing Technology Backgrounder Logitech? ConferenceCams are changing the way teams collaborate, opening new possibilities and eliminating old boundaries. Logitech is making it possible for groups to collaborate anytime and anywhere with products designed for small to large-size rooms. Logitech was an early pioneer of webcams over two decades ago and has contributed to video conference innovation ever since, helping to transform usage...

Getting started with Première utilisation Logitech® Wireless ...
16/02/2012 - www.logitech.com
Getting started with Première utilisation Logitech® Wireless Trackball M570 1 OFF ON OFF ON Getting started with Première utilisation Logitech® Wireless Trackball M570 ation inform rtant Impo Safe ty, co mpli ance , and warra nty 2 3 English cerrar esta ventana. F7 F9 F11 F13 F14 F15 www.logitech.com/downloads Español Puedes personalizar M570 con software gratuito de Logitech: · Cambia la asignación de botones a otros comandos. · Ajusta la velocidad de seguimiento y aceleración...

Rpt 2023001 Logi Cy23 Carbon Neutrality En
25/09/2025 - www.logitech.com
Carbon Neutrality Report For Calendar Year 2023 RPT- 2023001-EN TABLE OF CONTENTS Glossary 3 1. Introduction 4 2. Carbon Footprint of Logitech Products 4 3. Carbon Reduction 4 4. Compensation of residual emissions 5 5. Certifying carbon neutrality 6 ******************************************************************************** 6 Annex 1: Carbon Footprint 7 1.1 Life Cycle Assessment 7 ...

1 - Logitech
1 - Logitech
05/12/2014 - www.logitech.com
1 Thank you! Danke! 3 2 Merci! 1 Podzikowanie! 5 4 6 7 USB M505 M505 ON O:CT! akujeme! ;03>40@8< 0A! AA Köszönjük! English V mulcumim! Zahvala! Paldies! Podkování! Logitech® Täname!

????????????? - Logitech
05/12/2014 - www.logitech.com
ùb€R l¹ Go  ù7m;RÕ m;RÕT z1ÿ ùb€R l¹ Go  m;RÕg•“ÿ2007/04/03-2007/06/14 m;RÕe¹_ÿùb€–û[PÿLogitech®ÿ e¼VÛgRymQú ùb€R l¹ Go ù7m;RÕÿ mˆŒ»€Qá e¼m;RÕg•“ÿ ŒüŒ·Nûùxk>Œüùb€u"TÁÿ Nùxk>u"TÁNK^ú‹pU.Pù…N NT,500ÿ Sꉁ hx¼RjN ÿ žÏŒ¼W(m;RÕVÞQýN ÿ SsSïR0c[š^—[¶cÛSÖSðpcN-W wól¹l¹yh 150 QC ÿN _5—b˜M 50 QC+N_5—b˜M 100 QCÿ ÿbm;RÕVÞQý[ÄVÞùb€–û[Pÿ N¦Sïsr_—SðpcN-W wól¹l¹yh...

CASE STUDY: IT SOLUTIONS PROVIDER ENCOURAGES ... - Logitech
11/10/2017 - www.logitech.com
CASE STUDY: SADA IT SOLUTIONS PROVIDER ENCOURAGES INTERNATIONAL COLLABORATION WITH LOGITECH PRODUCTS. The Logitech ConferenceCam and Logitech HD Pro Webcams Facilitate Communication, Boost Productivity, and Reduce Travel. COMPANY SADA Systems, Inc. www.opportunity.org LOCATION Los Angeles, CA INDUSTRY IT Services OVERVIEW SADA Systems, Inc. (SADA) is a privately held business and information technology consulting firm founded in 2000. SADA works with its clients to develop innovative solutions to...


Fiche produit Sony : 15/1237479466215.pdf
16/02/2012 - www.sony.fr
S n v u iv ea S lnd l P oo o y o sn i u ao e a h t t .......................... ......................... ......................... d 4a 8n v mbe u u oe r P r - ot d V r i s ai P r e es l s e al e 0 1 0 2 n o i t i d É s res n D 7 ul t d 4 a N u e ué o v a ts V n z é o vilsn u elsin v t n d e e d c u r e o v l n o ai s e r e o n sa p ri p oo Ap ae C b r h t o p ael h ts lh t y e- o : s s l fn t n3 , mo eP n rmap r a o co D l i e d a oa a b lyg , n uel tc n lged mi i aaa e l o vl e h oo i e...

Fiche produit Sony : 66/1237478580466.pdf
16/02/2012 - www.sony.fr
Du 1er juin au 31 juillet 2010 FAITES LE PLEIN D'ÉMOTIONS AVEC SONY Jusqu'à 50 remboursés pour l'achat d'un appareil photo numérique ultra Grand-Angle Sony* Partenaire officiel de la FIFA * Voir modalités complètes et références concernées au dos du bulletin ou sur www.sony.fr/promotions OFFRE SONY DSC - JUSQU'A 50 REMBOURSÉS Modalités de l'offre Pour l'achat d'un appareil photo numérique ultra grand-angle Sony (1) (2) entre le 1er juin et le 31 juillet 2010 inclus, en France...

Mode d'emploi
Mode d'emploi
06/03/2012 - www.pentax.fr
K-r_cover_fre.fm Page 1 Thursday, September 23, 2010 4:03 PM HOYA CORPORATION PENTAX Imaging Systems Division 2-36-9, Maeno-cho, Itabashi-ku, Tokyo 174-8639, JAPAN (http://www.pentax.jp) PENTAX Europe Imaging Systems S.A.S. (European Headquarters) 112 Quai de Bezons - BP 204, 95106 Argenteuil Cedex, FRANCE (HQ - http://www.pentaxeurope.com) (France - http://www.pentax.fr ) PENTAX Imaging Systems GmbH Julius-Vosseler-Strasse, 104, 22527 Hamburg, GERMANY (http://www.pentax.de ) PENTAX Imaging Systems...

My Cloud™ Pro Series Network Attached Storage ... - Western Digital
28/03/2018 - www.wdc.com
My Cloud Série Pro !" Network Attached Storage " Stockage pour conserver vos photos et votre bibliothèque multimédia au même endroit " Modifiez, sauvegardez et accédez à vos fichiers multimédia où que vous soyez " Compatible Mac et PC " Transcodage matériel pour lire en streaming tous vos contenus grâce à Plex!" " Processeur quadricSur Intel® Pentium® N3710 cadencé à 1,6 GHz et 4 Go de RAM Avec une capacité de stockage presque sans limites, le NAS My Cloud Série Pro...

GEBRAUCHSANWEISUNG
GEBRAUCHSANWEISUNG
20/03/2015 - docs.whirlpool.eu
GEBRAUCHSANWEISUNG VOR DEM GEBRAUCH DES GERÄTES " Das von Ihnen erworbene Gerät ist ausschließlich für den Hausgebrauch bestimmt. Damit Sie den größtmöglichen Nutzen aus Ihrem Gerät ziehen, lesen Sie bitte aufmerksam die Bedienungsanleitung durch, in der Sie die Gerätebeschreibung sowie nützliche Ratschläge zur Aufbewahrung der Lebensmittel finden. Heben Sie diese Anleitung bitte als Nachschlagwerk gut auf. 1. Überprüfen Sie das Gerät nach dem Auspacken auf Beschädigungen und kontrollieren...

OrigamiInstructions Pikmin Body Red Yellow Blue DE
17/09/2024 - www.nintendo.com
Rotes Pikmin  K?rper Empfohlene Papiergr??e: 20 x 20 cm Falte mit der Anleitung in diesem Video mit! https://youtu.be/9wj72-RUv5U 1 2 Falte das Papier beidseitig in der H?lfte, indem du die gegen?berliegenden Ecken aneinanderlegst. 5 3 Klappe die linke und rechte Ecke ein und lege ihre R?nder an der mittleren Falte an. 4 Drehe das Papier um. 6 Klappe die untere Spitze zur Mitte hoch und falte sie. 7 Falte die linke und die rechte Ecke entlang der Knicke aus Schritt 2 nach innen. Falte...